Understanding the exposure triangle is an important step in improving your photography. It is contextual. I’d like to tell you the exact settings to use in each situation, but the fact is I am constantly adjusting. These adjustments change based on the subject you are capturing. Additionally, photo and video are handled completely differently. I’ll be covering photography-related examples in this video.
The triangle consists of you guessed it…3 elements. These are aperture, shutter speed, and ISO. I’ll break these down and provide examples. You’ll find these settings feed off of one another, so it’s difficult to speak of one without mentioning the others.
The examples I give here will be full-frame numbers. For Micro Four Thirds multiply everything by 2. APS-C cameras can multiply by 1.5.
Aperture
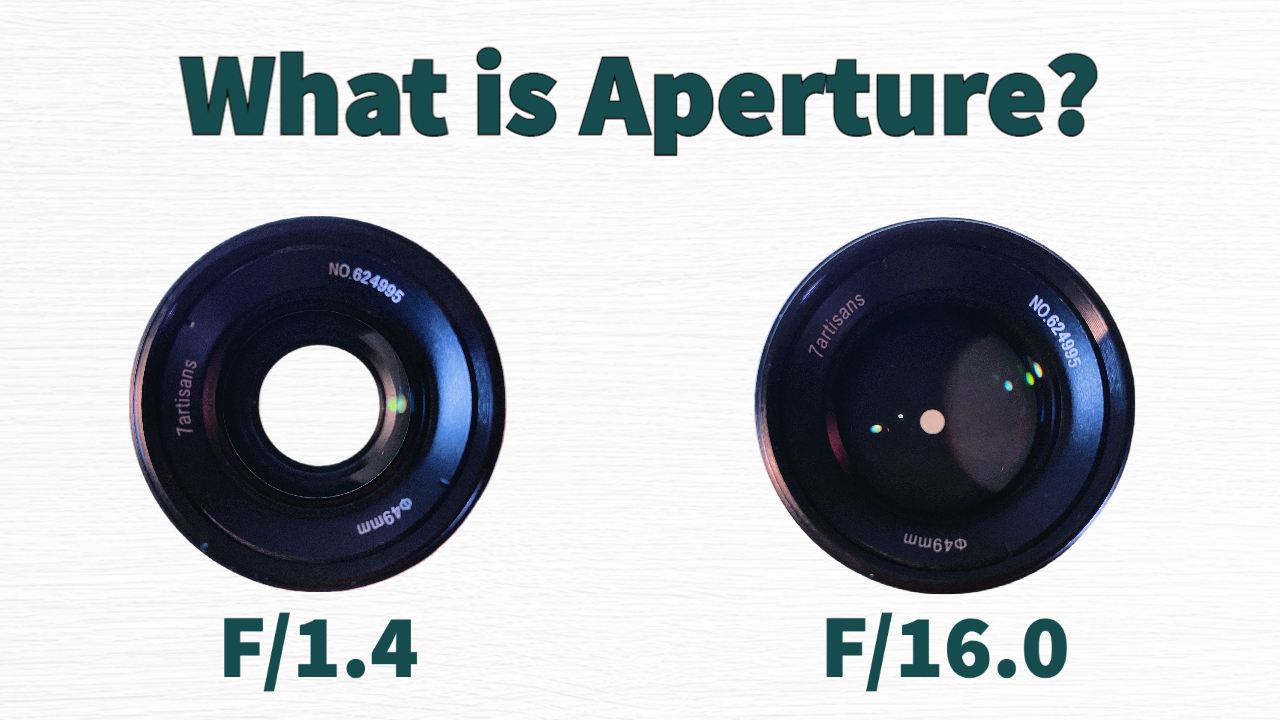
This is also referred to as the f-stop. Aperture can be a confusing setting at first. Part of this reason is a low f-stop number like f/1.4 means the lens is open wide. It is letting a lot of light in. The lower the f-stop number, the better it will be in many low-light situations.
You will hear photographers mention stopping down. This means they are closing the opening of the lens. It will let less light in. Stopping down from f1.4 to f/16.0 will close the lens opening quite a bit. A good visual for this would be the difference between seeing something with your unobstructed eyes vs rolling up a piece of paper and looking through it. This changes the depth of field and how the camera sees the light. Telescopes for example use a high f-stop. The need to see far without excess light polluting the signal.
One example where you would use a low f-stop number is portrait photography. This is one of the easiest ways to get that blurry background, also known as bokeh. Using a Canon 50mm f/1.8 lens at f/1.8 would be considered shooting wide open. The reason is that f/1.8 is the maximum aperture.
You don’t always want to shoot portraits at the maximum aperture and I would honestly not recommend doing this. The reason is your depth of field will be small. If you are close to your subject, this would likely cause their ears to be blurry. As you step back from your subject, the depth of field will increase. To put that in perspective, a headshot at f/1.8 might result in the subject having blurry ears while taking a full body picture might not. Make sure to stop down for group shots, especially when you have multiple rows of people. I would probably start around f/5.6 and adjust from there. You can use a low f-stop number for single-row group shots, but be aware of the small depth of field. I try to line everyone up so their facial features are aligned and take the picture straight on. This is not my favorite shot, but a lot of people love super blurry backgrounds. I’ll still stop down to around f/3.2 to be on the safe side. You can’t make a blurry picture sharp, so be careful when working with clients. It’s better to stop down and play it safe.
When taking family photos, aperture is the setting I choose, and then adjust the shutter speed and ISO as needed.
Landscapes and architecture are a few examples where a high f-stop number might be preferable. These are examples where you have a large subject that needs to be in focus.
There are exceptions to any rule. Get out there and play around. See what works best for you. Blurred backgrounds can be fun, but try to keep your main subject in focus.
Next up in this series will be shutter speed.
Thank you so much for watching. If you enjoyed this video, please like and subscribe.
Til the next time…
#exposuretriangle #aperture #f-stop #manualmode #aperturepriority

