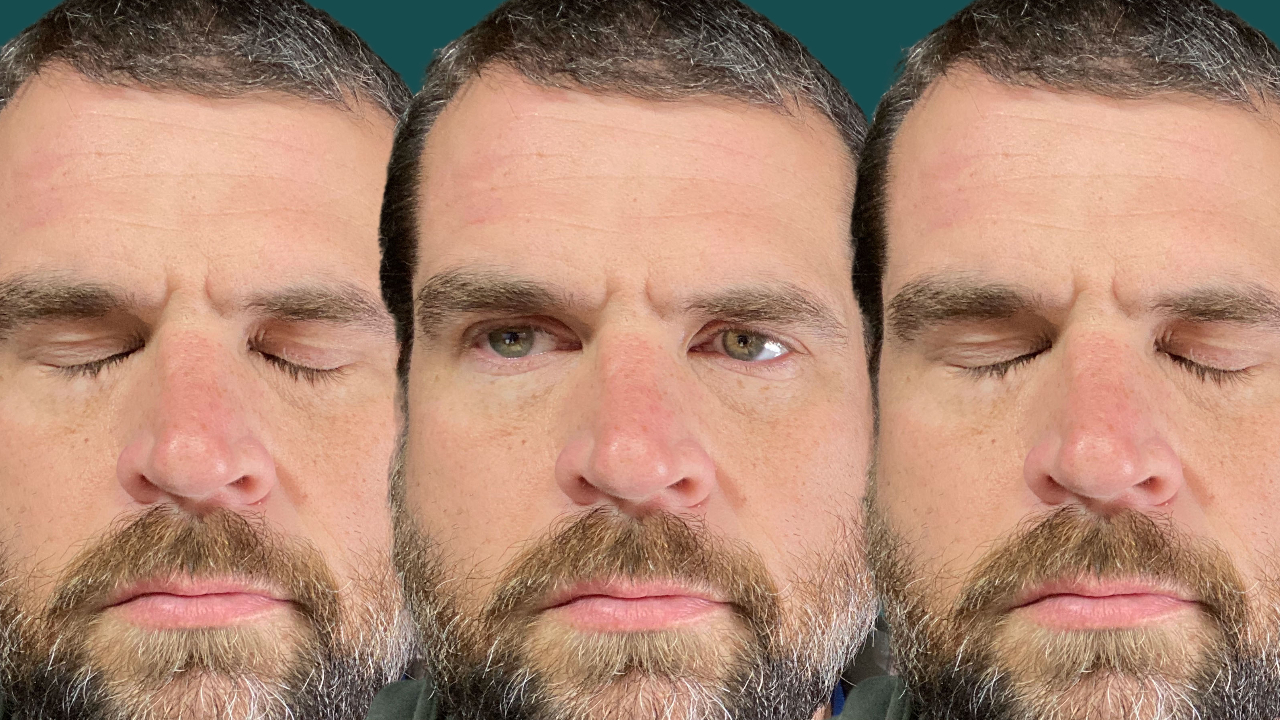
There was a reason to start with aperture. It is important to understand what an f-stop is and how to make the lens open wider or stop it down. The visual representation of this is an important concept to grasp.
Please experiment. Try Aperture and Shutter Priority modes to see what happens with various settings.
I highly recommend learning the manual mode of your camera and adjusting each of the three settings based on your own preferences. This will help you get consistent quality in any situation.
Shutter Speed
A simple way to visualize shutter speed is by picturing a reverse blink. Your eyes are closed. The amount of time they are open is representative of what the shutter speed does. This is the time your image is exposed.
A good rule for portrait or handheld photography is to double your focal length for your slowest shutter speed. With a 50mm lens, you would want to shoot at least 1/100. You might have noticed from some of my examples that this is a rule I am willing to break. It’s good to have some guidelines though and I highly recommend experimenting on your own.
Larger numbers mean the shutter stays open longer. The number 1 for example would represent a full second of exposure which is quite a long time. This can be useful for capturing a waterfall or something like that where you want the water to blur which shows movement. Another example would be a busy road at night. You will capture light trails with a long shutter speed time.
Often you’ll need to stop down the aperture or use an ND filter to use a long shutter speed without overexposing your photo.
A small number would be something like 1/4000. This can be useful for sports and wildlife or any other time you need a sharp image of a fast-moving subject.
I’ve used fast shutter speeds like 1/4000 on bright sunny days when needing to keep the aperture wide. Sometimes people need that bokeh. Stopping down to a narrow aperture isn’t always the preferable option. A fast shutter speed is a nice choice for this type of setting.
Perhaps you need a fast shutter speed indoors for something like a basketball game. Often the lighting is not sufficient. Flash is obviously a nice option, but it isn’t always allowed. In such as case, this is a great time to increase your ISO.
This pendulum is going to be used to visualize the difference between a short and a long shutter speed.
First, we will look at a long exposure time. You’ll notice the motion blur. There are certainly times when this can be appealing such as a waterfall. You might need to stop down the aperture or use an ND filter to avoid overexposing the image.
Now let’s look at a fast shutter speed. Notice how the motion is basically frozen. Everything is sharp and in focus. Sports and wildlife are examples where a fast shutter speed is needed. This is another way to shoot a waterfall. Instead of having motion blur, you will freeze the moment and see more detail on each little water droplet. You might need to open the aperture and bump up the ISO to achieve the brightness needed to compensate for the fast shutter speed.
I don’t want to get ahead of things, but the more we talk about the exposure triangle, the more we will see how each part works together.
Sports, wildlife, and flowing water are great examples of when you might want to choose your shutter speed first and adjust the aperture and ISO based on that.
We are moving along and have covered 2 out of the three parts of the exposure triangle.
Next up is ISO.
Thank you so much for watching. If you enjoyed this video, please like and subscribe.
Til the next time…
#exposuretriangle #manualmode #shutterspeed #shutterpriority

